In his regular column, Vainglory Senior Editor BicycleSquid highlights interesting, confusing, complex or obscure aspects of Vainglory. If you’d like to see a topic covered, let him know here.
The roam position is evolving in Vainglory’s meta. Traditionally, roamers have been the utility player — both the tipping point for teamfights and the tank for jungle levelers. A good roamer would cut between the jungle and lane as necessary. While roamers did not necessarily score tons of kills, they were the point guards of battle — big on assists, making their teammates better and using clutch activatable items when it counts most. Their role on the team was clear, but limited. The roam changes in Update 1.19 and beyond open up more possibilities … if you think differently about the position.
ROAMER EVOLUTION
In Update 1.19, we altered experience and hero balance as well as added new items and tuned others, all to create more depth and variety — especially at the roam position.
But these changes earned a mixed response from the Vainglory Community. Instead of giving plenty of options to players, some felt even more restricted than before. This can be linked to the tuning of the new contract items as well as mainstay roam items. It’s definitely fair to say that the position underwent some growing pains, as Zekent has stated that he was chiefly concerned with not destroying the meta with new overwhelming and overpowered options, opting instead for an initially conservative approach.
Of course, the goal of roamer changes in 1.19 was not to kill the position but rather the stigma of how roamers should be played. A roamer is no longer just a tanky front-line support. And as Updates 1.20, 1.21 and soon 1.22 unfold, the new role of the roamer is crystallizing. There are now more layers to the possible compositions that teams are playing and more choices for roamers to make.
OPEN-ENDED ITEMS
Traditionally, the first-buy for every roamer was Ironguard Contract. Then, the roam player would purchase Fountain of Renewal and Crucible/Atlas Pauldron before Warhorn/Contraption. Roams were the “Swiss army knife of team defense.” But since they were a utility-support-tank with set item paths, decisions around item building for roamers was fairly limited.
With the 1.19 changes, there was no longer a requirement to eventually turn that Ironguard Contract into a Warhorn or Contraption, so many more possibilities unfolded. For example, roamers can buy carry items like their lane brethren in addition to support items.
Roamers also don’t have to be a tank front-liner. As Lyra has proved, roam heroes can be effective even as a squishy backline presence. Lyra’s impact, in fact, was so large that she rocketed to the top of many players’ “Must Ban” lists.
INFLUENCE OF UPDATE 1.21
In terms of roamers, Lyra and Phinn have had an extraordinary influence on the current meta. Picking one or the other not only defined your team comp; it defined your collective playstyle and moments of opportunity within the match ahead. Meanwhile, Lance turned from a stalwart roamer into a popular flex pick, getting played more and more as a weapon jungler as it was popularized by stars like Team Secret’s Palmatoro and Phoenix Reign’s Statusbaked during Evil Eight esports broadcasts.
On a broader level, recent updates also introduced a larger change: roamers taking last hits will no longer have a large negative impact on a team’s gold net worth. Instead, they still generate the same amount of gold since there will always be a 100%/75% distribution to two team members near each other. Teams may now more strategically decide where to funnel gold when they have multiple heroes reaching item breakpoints.
HOW TO ROAM (NOW)
Before we get into the minutiae of “how to roam as x character,” there are some basic strategies that all roamers still adhere to. Most roamers start alongside their jungler for the first rotation, although where they go afterward is much more variable than before. They should help the jungler clear the early camps while trying to absorb the brunt of the damage. (Just how much damage is dictated by the roamer’s first-buy.) Despite the changes to gold distribution, roamers should still let their ally last-hit.
After an initial run through the jungle, some roamers will accompany their junglers toward the backs while others will press into enemy territory. Others, still, will “babysit” their lane ally and bully the other laner. Roaming in the current meta is far less linear than in the past. Roam decision are largely contextual. Who is your laner? Does your laner need help? Can your jungler clear safely alone? How aggressive do we want to be? Roamers can strategically approach the early game and early purchases based on the team’s overall composition, rather than just going through the usual motions.
Instead of routine jungle clears, the roamer is shifting to play the mid-map more, travelling up and down from lane to jungle shop. The more multidirectional your play, the larger your influence on the game. And don’t assume the roamer is the automatic face-checker of all danger locations on the map. The introduction of squishy roamers changes the rules, and if Lyra is leading the way instead of playing passively, she may be dead before the fight begins in earnest.
WHAT TO PURCHASE
A roamer’s first buy has transformed from the most obvious moment in the game to an interesting choice point that says alot about your intent. Ironguard Contract is still very much an option, allowing you to tank damage, heal up and stay close to your carry. But more and more, roamers are opting for early-game damage before transitioning into traditional items. A start of one (or even two) weapon blades is commonplace now, speeding up jungle clear times and putting you in a position to pick a Level 1-2 fight at the jungle shop.
Ultimately, Fountain of Renewal is still the cornerstone roam item. It’s very difficult to win a mid-game fight if one team has that heal and the other doesn’t. Some things never change.
WHO SHOULD ROAM (HERO INTRODUCTIONS)
Advanced players may skip this section, but ask yourself, “How many of these roamers would I feel comfortable using in a competitive match?” Perhaps pick one or two more to practice to expand your playstyle options and possible team comps.
Six heroes are roam-primary in the current meta, with others used as off-meta roam picks. In general, most of these heroes feature one trait in common: the ability to control a teamfight. Roamers provide an advantage for the team that is initiating the fight or counter the other team’s strategy in a teamfight. In addition, the roamer usually provides another advantage for his/her team. Either they heal their teammates or provide a great deal of damage absorption as a “tank.”
ARDAN
Ardan is great at initiating fights and staying alive long enough to win them. He initiates with his ultimate, creating a zone that separates enemies and isolates targets. A great Ardan will also stun enemes against his Gauntlet wall, providing an even larger starting advantage. Ardan is perhaps the most “clutch” roamer, using Vanguard to keep squishier allies alive. But in the current meta, Ardan can also opt for more damage to make his Blood for Blood ability really sting.
Catherine
Catherine can counter heroes who do lots of burst damage in the game and is therefore a valuable asset in teamfights. Her reliable stun and silence are unparalleled, making her a safe and valuable pick to just about any team. To initiate a fight with Catherine, you should send Blast Tremor into the enemy team. She can also stun in two ways: by locking down a target or peeling for your carry. The other aspect of Catherine is that with her Stormguard bubble, she can bodyblock all the poke heroes in the current meta. It’s essential to put yourself in front of Kestrel or other skillshot hero. This not only protects your teammates, but can nullify the enemy carry or force them to waste valuble time repositioning.
Fortress
Fortress is unique among roamers, as he’s rightly classified as a Warrior. He’s not there to tank damage (usually); he’s there to start fights and then start more fights and on and on, even accelerating allies into battle. He is considered one of the highest DPS roamers in the game and his ultimate is one of the strongest initiations in the game. (And if you’re roaming against a Fortress, prioritize War Treads so you can disengage when he uses Attack of the Pack!)
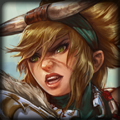
Lance
Lance is one of the tankiest heroes in the game and a real force in crowd control. To be successful as Lance, you need to know how to combo your moves. Impale is his primary initiation move for teamfights while Gythian Wall is his main form of peel. This ability knocks the target away, but if they hit a wall, they’ll be stunned as well. Combat roll lets him move around the fight — either initiating a fight from a distance or get to an ally to peel or protect. Playing Lance is all about creating the necessary angles of attack to land your Impale, which damages and roots the enemy target. It’s a hero that requires practice and precision, but he’s incredibly rewarding when it all begins to click. Lance is also a terrific representation of the current expanded nature of roaming in Vainglory. He can tank up. He can build damage. He can duo jungle. He can camp lane. It’s not what you can do, it’s why you do it.
Lyra
Lyra is the least tanky but also the best healer in the group. She also initiates teamfights in the least obvious ways. She establishes zones of control, heals allies in an area as well as halting enemies from initiating or chasing your allies. She, more than any other roamer, benefits from rushing Crucible first. Her Bright Bulwark is a slow zone for enemies, allowing a team to peel certain enemies. Her ultimate is tricky to use but can be deployed as both an initiation move (by getting Lyra toward a specific target) or an escape route. Lyra has provide immense harass hanging out in lane, and she must anticipate perhaps more than any other roamer. If she sees (or senses) an impending gank, her use of Bright Bulwark will change the terms of the fight … or completely nullify the engagement.
Phinn
Phinn’s impact on engagements and teamfights is just as large as Lyra’s, but in completely different ways. His Forced Accord is the ultimate engagement tool, pulling poor enemies into fights they never asked for. And the Fortified Health he grants allies, makes fights last just long enough to come out on top. Phinn is also great in teamfights because he can’t be crowd controlled. He moves where he wants to, free of the effects of a stun. He is perhaps the best late-game support because he gains 15% on item stats, which means he’s one tough troll to kill with the proper items. His abilities punish enemies and aid his allies, which always feels great as a roamer.
OFF META: ADAGIO
Adagio is primarily a lane-bound crystal mage, but his healing and buff making roaming an option for the adventurous spirit. Adagio can initiate combat in multiple ways. He can boot into the enemy’s ranks before casting Gift of Fire onto himself or an ally. Then, Adagio would trigger Verse of Judgement, looking for multiple stuns. Adagio also can initiate combat by utilizing Agent of Wrath on the highest attack speed ally or on a hero who can throw from range. Adagio is able to amplify the damage of his allies and ensure they live longer.
OFF-META: PETAL
Similarly, Petal’s healing on Spontaneous Combustion makes her a crystal-roam possibility. After a brief period of stupidity, Petal’s munion AI seems to get smarter and smarter every update, so sky’s the limit on what players might pull off in the future.
Hope this helps increase your roaming comfort level and expand your roam thinking. If you’re still playing the roam position like the “old days” or resisting playing roam, now’s the time to try, playing with more depth and choices than ever before. Pick a roam hero and head into the Fold!


 Sorrowblade: Gives you the highest amount of weapon damage in one item. You hit people, they hurt. Commonly the first item you buy. Everyone benefits from this.
 Bonesaw: Will shred the enemy’s armor, so it’s great against tank heroes or heroes who buy armor like Atlas Pauldron or Metal Jacket. If you’re facing a really tough enemy that you just can’t seem to hurt enough, this will help bring them down. Great on any hero benefiting from attack speed, like Krul.
 Tornado Trigger: Grants a hero the highest amount of attack speed and increases critical chance. If you want to hit someone a lot with your basic attacks, such as Joule and Glaive, this is a great option. Hit more often!
 Breaking Point: The longer the fight goes on, the more powerful Breaking Point becomes. So it’s great for sustained fights and heroes who can stay in the fight for a while. If you can stay alive, you can do a huge amount of damage, but assassins generally don’t live long enough to properly use this. Kestrel and Rona benefit greatly from this.
 Tyrant’s Monocle: Highest amount of critical chance and weapon damage. Good for anyone who wants to increase their likelihood for a big hit. Usually purchased after other items. Instead of hitting someone more often, your single strikes are more likely to do a lot of damage — great for heroes like Ringo.
 Tension Bow: Good early-game item that gives you a big spike of damage every 6 seconds. Perfect for anyone who wants to do the bulk of their damage in quick bursts, like the assassin Taka. Note: It is not recommended to purchase this item in the late game; it’s impact is severely lessened.
  Serpent’s Mask: Grants lifesteal, so it’s great for sustaining yourself in a teamfight. Great for warriors like Rona or Blackfeather who can survive long enough to take advantage of its benefits. Differs from Breaking Point in that it focuses on making you live longer rather than making them die faster.

 Corrupted Genius (Heroic Perk)
 Malice & Verdict (A)
 Drifting Dark (B)
 Oblivion (C)


 Shatterglass: With Samuel’s basic attacks and Malice & Verdict, it’s critical to pump out as much damage as possible.
 Eve of Harvest: The lifesteal aspects of Drifting Dark are understated but greatly enhanced by Eve of Harvest.
 Broken Myth: Multiplies your damage. ‘Nuff said.
 Clockwork: Since Samuel is energy hungry, Clockwork helps him recover and use his abilities more frequently in the late game.
 Frostburn: Frostburn is also a great purchase because anyone who is affected by Samuel’s Drifting Dark will be slowed!
 RONA
RONA VOX
VOX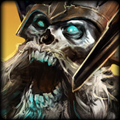 KRUL
KRUL
 TAKA
TAKA CATHERINE